Entoworks Sprint Reviews
Sprint 6
Sprint 6, coming up on the very end of this project and it’s absolutely crazy to think about! There have been a lot of challenges in making this game happen but I’m really proud of the other programmers on my team for fighting through and making it happen. For my work this sprint, it was primarily focused on the level selecting and providing tools and player feedback for the system so that everyone can play the levels the way they were meant to be played. Before I started those tasks, I worked on something I knew how to do right away, and that was a little more working with outlines.
What was wanted was for the enemy units to be outlined in red in the game so that the player could easily identify who the enemy was. I had something like this in mind when I made the outline shader, but this is actually putting it to use in a way that matters. Luckily, one of the other programmers in the group had already set up a system for the units spawning, so I just needed to piggy-back off of it a little bit. When the units are spawned, they are sorted into a list of allies and a list of enemies. This happens as the units are spawned in and the data kept on the UnitManager. By accessing that list after the initial loading of the level, I was able to add in a bit of my own code that would access the unit’s outline color and change it to red. However, upon seeing all the different prefabs for the different Entogear, it was clear that I was going to have to change their prefab’s order. Because they don’t have a consistent name, a consistent number of pieces, or even a consistent spot in the hierarchy, I had to make one of those consistent. I changed where the actual Entogear bodies were in the hierarchy to be at the top and searched children for the script I was looking for. Putting the bodies at the top allowed a consistent reference and less time the computer had to take to get to the object it needs. Once I finished that, I loaded up the level and saw that it was working! I was surprised how quickly it made me identify the enemies in the scene, great change.
Onto more of the meat of the sprint, the first couple of tasks involved setting up the level designers with something that allowed them to playtest levels quickly so they could balance and iterate on them without having a lot of back and forth to do. First and foremost, this meant branches and scenes to work within the GitHub, which was fine and didn’t take too long to set up. Making the tools in the game for them to use took a little bit more time.
The first task was to make sure that the two level designers could easily access their levels on the map. Because one had one biome and one had the other, I needed to make sure they could transition the scene between them to easily do it. This was something that was going to need to be in the game anyways for the player, so I figured, why not put it in now? I thought this would be as easy as using the camera lerp function I had made before to go between two spots, but upon realizing that the canvas moved with the camera, I had to make some adjustments. Although it looks like the camera is moving between two points, I actually have the whole image, with its attached buttons, moving in front of a static camera. I then made a few points to hold the transform positions of where the camera should sit and a couple of buttons to move up and down that list of positions and we have our map change system! I really like how simple but fun it came out to be. Having a smooth motion between the two points really makes it feel more real and more fun to interact with which I love.
This next one was an interesting task. So, each node on the level map used to correlate only to one other level in the game. However, this was being changed up so that each node had a random selection of levels that was specific to that node. Here’s the kicker though, we also needed to make this friendly for the level designers, allowing them to playtest levels over and over, and it would be a pain to have to repeatedly reload a level because it wasn’t the one they needed to test. So I needed to make both the random selection system as well as a way to completely negate it and choose the level for the location. For this, I used my LevelSelectorLogic script and expounded upon it to do more. I had it hold a list of strings for each of the levels so that it could be changed button to button. Then I set up a randomizer to go through however big the list was of levels and pick one to be the level name. From there, I moved on to the static level option. I set up a public bool for “Use Static Level” as well as an index number for what level they wanted. I also set up a bounds on that index so if they put in a number that was too high or was negative, it would get clamped to whatever the list length was or zero. Then I set up logic so that if the level designers opted to use a static level, it would only load that level. What was the most surprising thing about this feature is how quickly I was able to put it together and test it and make it work. I thought it would take me a day and a half but it only took me 2 or 3 hours from start to finish. It turned out great and was usable for all the level nodes in the game which is awesome.
The next thing I worked on was more player-centric than level designer-centric. For this, I made arrows that would spawn in after a player completes a level so that they could easily see where they were supposed to go next. I already had made the system to disable buttons on the level select screen, so it was as easy as making the arrows disappear if their level wasn’t unlocked yet. Then I added them all to the map, manually scaled them to point at the next node, and it was set! Oh, I also had to make the arrow texture itself, because Unity didn’t have one available, but that was pretty easy, just putting a white triangle on a white box with a transparent background. Short and sweet but it does remove a lot of the guessing in what was happening in the level select screen.
One of the last things I worked on, and the last thing involving the levels was making a proper win/loss screen for the game. This also was pretty simple as I’ve done this a lot before. Adding a canvas that disabled at start, add some text that changes based on whether the player wins or loses, and a button to let the player go back to the level select screen. Something that was nice though was having the button texture to put on the buttons. It makes it feel so much more complete to have those on.
The last thing I worked on was finally implementing my VFX attacks into the game! Well not so much implementation, that was another programmer’s job, but more so rescaling them for the size they were being used in the game. This involved a lot of little adjustments to lifetime of the particles, the size of the orbs, but most notably, how they spawned in. One issue that was present with all the orbs was that the orbs didn’t spawn in with the proper size that they do once they’ve been active for a few sections. To resolve this, I simply had a couple of orbs that spawned in at their final sizes right away so that they would have some substance as the other orbs pulsed into the correct size. It was really cool to see all the effects correctly in game flying across the grid. Makes me really happy to see, even if I really want to see those effects actually impacting and having an additional impact effect as well.
Sprint 5
For this sprint I had a change in focus to a little more coding and adding in assets to the game where they were usable and showing off the hard work of our 3D artists. I didn’t mind making this shift from working through my VFX because I really want to see this game get some more shine and care and really show off what it’s about, and what’s the point of VFX if there’s no game behind it to play?
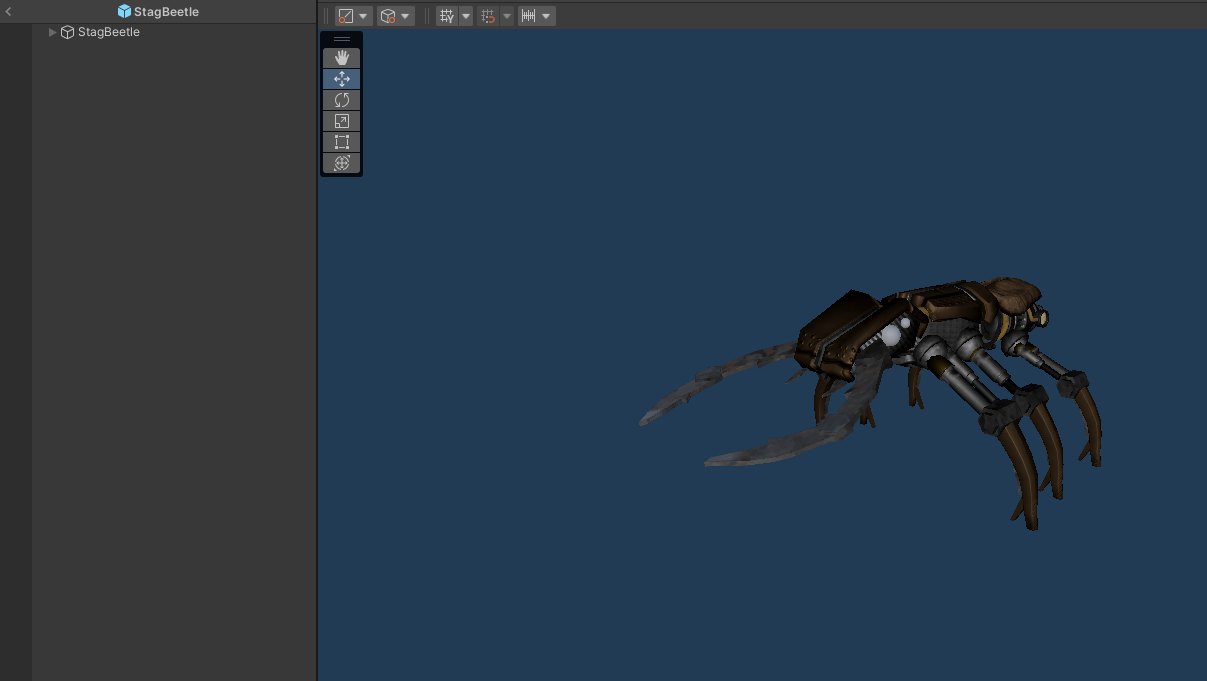
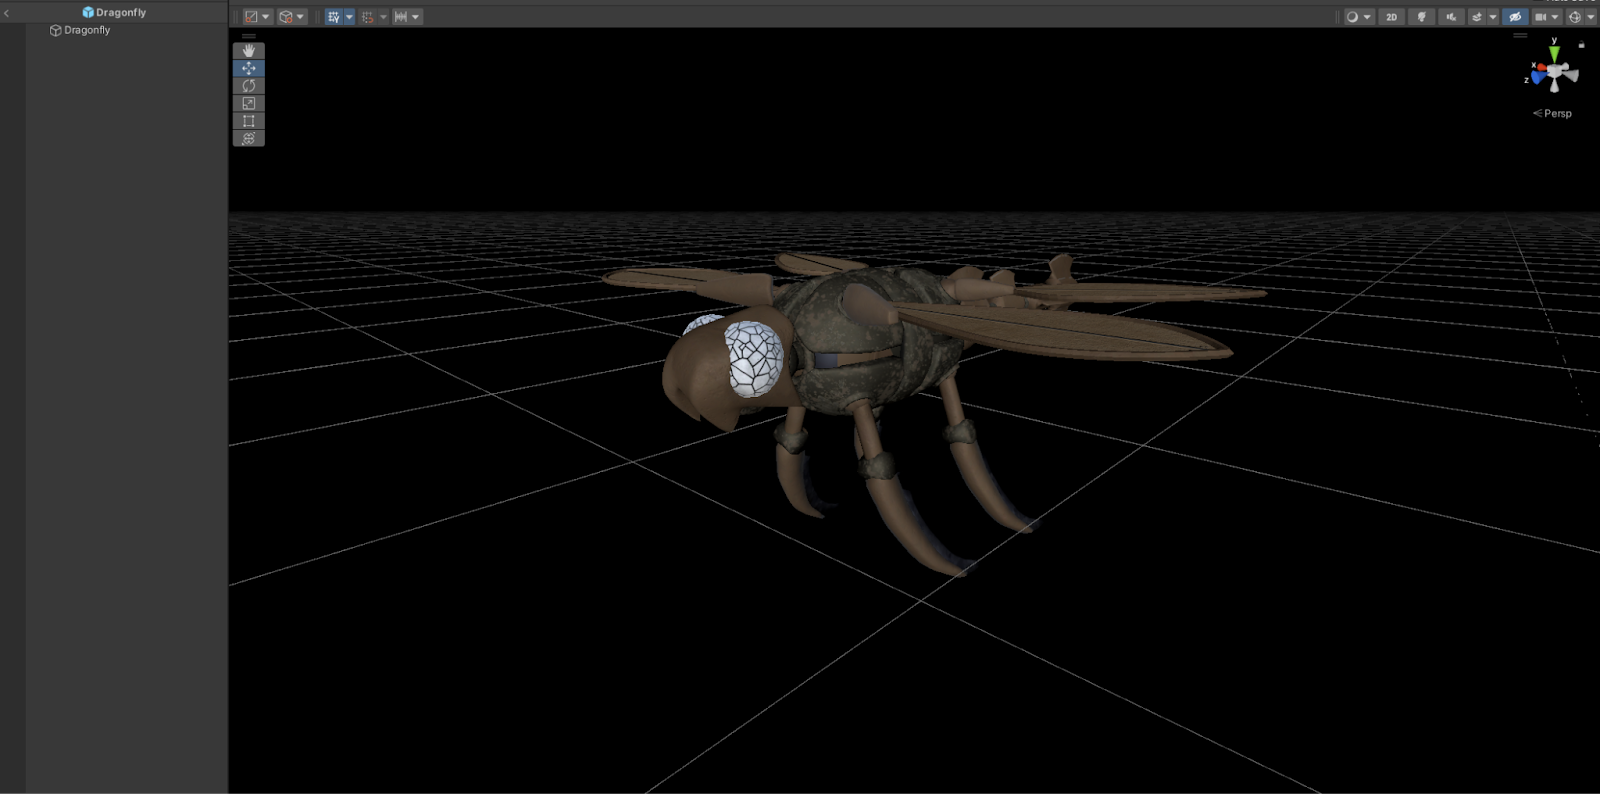
First item I tackled was getting the Entogear models into the game with all the parts they needed to have. Unfortunately, this went a little slow when it came to the Stag Beetle because it was exported as separate pieces instead of a whole mesh, but it only slowed down applying the materials to it. I then had to make sure they had the outline shader applied to them, and that the models got scaled appropriately so that they were the right size in Unity and still had 1,1,1 scaling. Additionally, I also gathered together all the texture files, made materials, adjusted smoothness values, and applied them to the bugs. The one bug not pictured, the Bee, still hasn’t gotten textures loaded, so I couldn’t quite finish that card until they were finished, but I still brought in the model and scaled in and such.
My next task was to set up a level manager so that the player could progress through the biomes one level at a time and not skip around places. My initial idea for setting this up was making a number that would determine the max level a player could travel to. As long as each button checks to see whether its level value is higher or lower than the player’s max available level, and disables itself it is too high a level. As it turned out, this actually worked! Thank goodness a simple system works for a simple purpose. The second thing I had to work out though was the player finishing a level to progress the counter. For this, I set up an event for when the player wins a level, and subscribed a function on the Game Manager to it that increases the player’s cap when they complete a level that is equal to their level cap. This also worked out well and as intended, which is almost strange, because since when is a programming task ever straightforward?
The next task that I was assigned was making sure that levels spawn in with their correct tilesets that match their biome. For this I relied on my level select tool that I’ve been building up to determine that. Adding an enum to it for the different biomes the level could be, I was able to add a list of tilesets to the Level Selector that would choose the tileset based on the enum on the level button. This all worked according to plan, I just didn’t realize it at the time because there were some big bugs going on.
As it turns out, there was an issue with the tilesets that caused them to not load correctly. In fact, they loaded so badly that the game would be unplayable on those levels. I talked with the producer to see if the most recent tilesets were what I was working on, the level designers, got into a call with the level designers to compare and contrast why a certain tileset was or wasn’t working, it was difficult to find anything different and eventually we left it to our designer to figure out because it was their codebase we were working in. They eventually found out what the issue was and was able to make the tileset work again, thank goodness. Unfortunately, it took a lot of trial and error before we arrived at that conclusion.
Sprint 4
This sprint I had a little bit of a different spread of tasks although they were primarily focused around my VFX and what they needed to functionally do. I also did a bit more work for the build as the programmers have started to get more features into the game as well as adding a feature of my own.
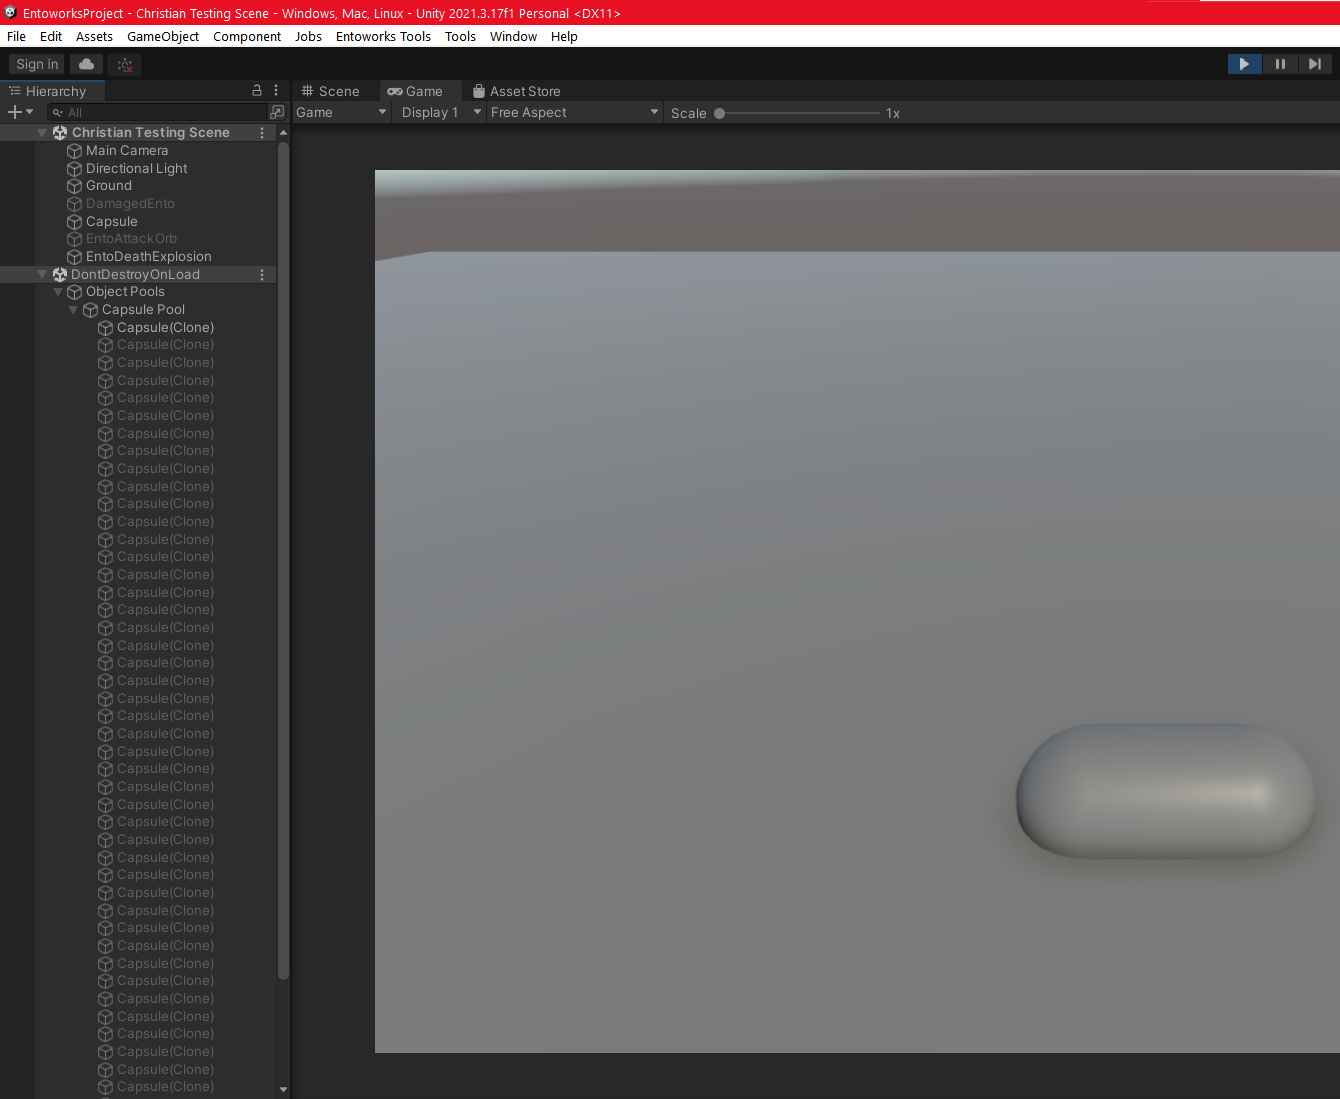
The first task I did was something I knew was coming before so I already had a bit of an idea how to do it. I needed to make it so that the player’s units changed colors and also had flashed to help bring attention to the player’s unit. I set up a lot of the backend work already making a script alongside this shader that allowed its color and highlight toggle to be changed. What I really had to figure out was exactly where the unit was being selected in code so that I could pass the message along. Luckily, making the previous two builds, it only took me half an hour or so to figure out where the spot was, and plug in the logic I needed, and boom! Selected units with a green highlight! I’m happy this came out well but there is a bug in the build where a player’s unit will be selected even after its turn is done, making the highlight then toggle wrong, but that’ll be a bugfix for next sprint.
Unfortunately, these next two pictures only tell the story of how I attempted to make a toon shader for Entoworks. As it turns out, it’s actually very, very complicated to make a toon shader yourself and requires going back and forth between shader graph and custom shader code. One of the biggest issues with a toon shader is that each light has to be accounted for individually. What I wanted to do was find a way to programmatically find each light affecting an object and then have that affect the object in the same way, taking into account the direction, distance from the object, and color of the light. It’s something that I thought sounded reasonable until I realized that I was basically asking to make a render pipeline complete with a custom lighting engine. I poured over so many tutorial videos, blog pages, discussions, all about toon shaders, and there were a lot, but none of them were really what I was looking for. In the end, the leads decided that it was probably best to move me on to different tasks, so I submitted the simpler toon shader I had made and called it. I would’ve loved to have figured out the trick to get, basically, a new lighting engine into the game, but I don’t think it made sense to do so with the timeline of this project.
After struggling for so long with the toon shader and pulling my hair out trying to make it work, I decided to move backwards to something much more manageable. My next task was to make the level select screen, specifically using the 2D art assets made by our team to give a backdrop to where the levels will be theoretically located. One thing I was worried about going into this was finding some crazy long chain of functions that makes it impossible for me to understand where exactly a level is loaded. However, I was pleasantly surprised to find it was as simple as following a file path by name. To me, that meant all I needed to do was set that string on the level select screen and then I could go to whatever level I needed to without diving into and changing a bunch of code that’s already been written. It is a little scary using a string variable because of the tendency to misspell things, but making it public allowed me to copy paste the names into the levels list to ensure I wasn’t missing any punctuation, capitalization, or anything else that could trip me up in loading these levels.
Ahhh, now back to the fun stuff. Besides shipping the build and making sure it linked to the correct feedback form, making this lava shader and a supporting VFX was my final tasks. The lava shader was so interesting to me because I was really going to be playing with the masking inside of shader graph. I knew I wanted to have the churning lava with all its dramatic oranges, yellows, and reds, but also the cooled volcanic rock floating down the river. It took me a while to figure out how to mask it out so that the rocks color was influenced by the lava color and that the normal details only showed up on the rocks themselves. I did really like what I came out with, but looking at it now, I think I should add some normal details to the lava as well. They should be softer, bigger in scale, and change a bit like the pulsing colors beneath them. Something subtle that I also did was I messed with vertex displacement, which basically means I made the points on the plane move up and down depending on what they represented. This allowed me to make the rocks poke up from the rest of the lava to really make them feel like actual rocks floating down a lava river.
The accompanying VFX I made with the lava was this popping lava bubbles. I think it adds a bit more dynamism to the lava and makes it feel more alive and not as flat in its movements. I did this by layering default sphere meshes over default unity particles so that the bubbles looked good and that they were glowing. I made their size increase over time up until the particle died, at which point I made a little spray of particles like the bubble had popped back into the lava. I really like the effect, but the one problem I had was that the bubbles were coming up from the rocks in the lava as well. I find a way to mask out the bubbles using a 2D texture, kind of like an alpha, but what I couldn’t solve was how to get the lava’s moving alpha to the VFX graph. There’s not a way that I can find to export a node from a shader graph and so I couldn’t get the exact mask that I would need to make sure the bubbles didn’t show up. It’s frustrating to know what I need, and where it is, but not how to bridge the gap between where the needed info is and where it needs to end up. I might have to dive into custom shader nodes in order to get the exported texture I need, but I’ll have to research it more in my own time to see what I can do.


Sprint 3
Shaders were the name of the game this time around for sprint 3 and I have to say I’m pretty happy with how I was able to work them out. Generally I’ve felt more at home in the VFX graph than the Shader graph in Unity, but shaders are a huge part of VFX so it was good I was put on them more and forced to do a couple of common, but difficult shaders.
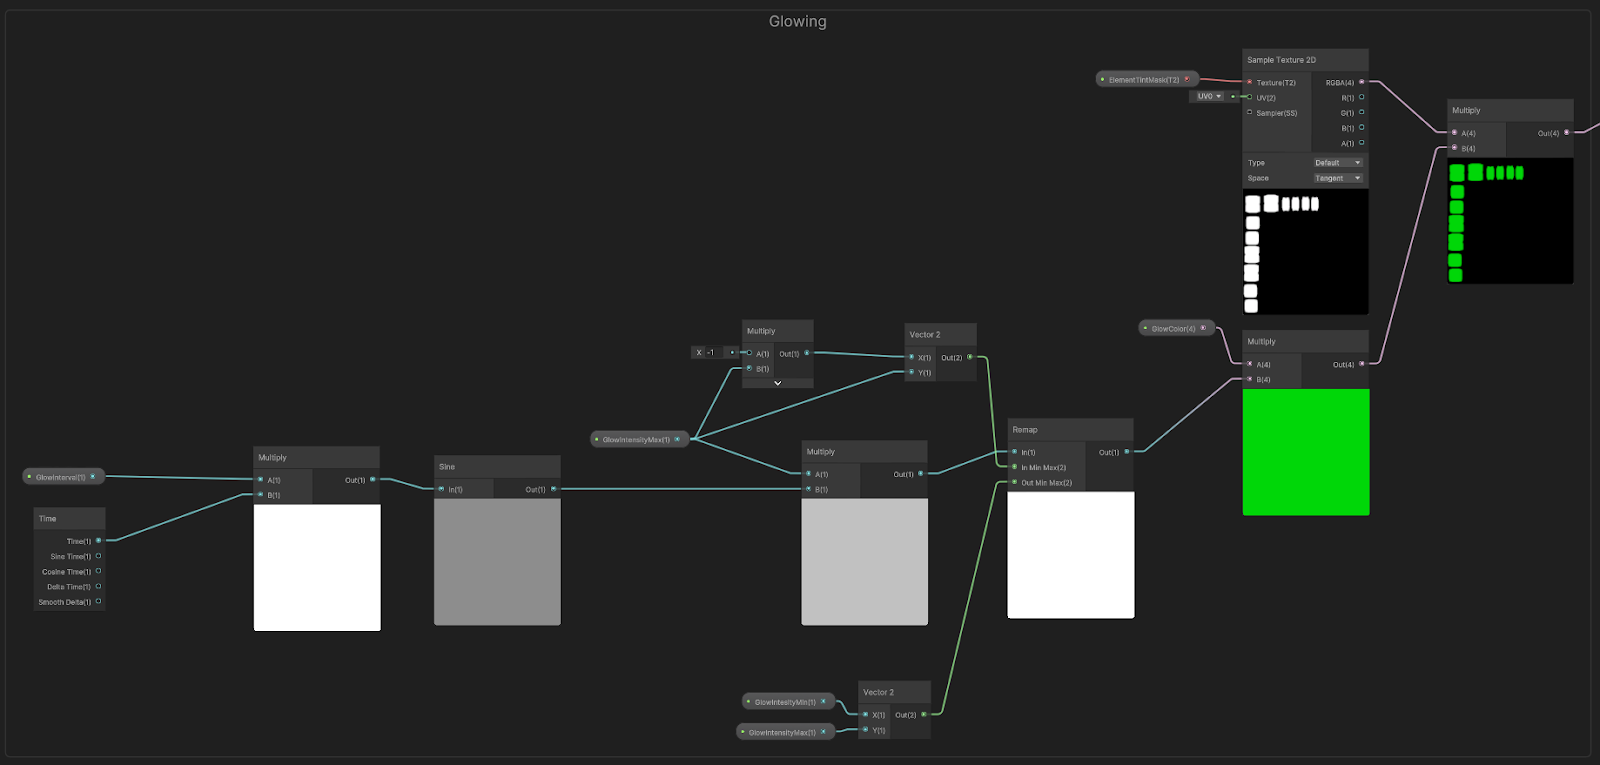
The first shader I tackled was one that was a bit more simple in making emissive parts of Entogears flash in customizable colors. An interesting part of this task was that I was building this within another shader that was already made by my design lead. Luckily, I already had an idea of how I was going to get the shader working from previous work so I got into it. I started by getting a flashing going using a Time node and a customizable speed multiplier plugged into a Sin node. After that I put in some customization options for the glow intensity and color and multiplied it by the emissive texture of my test model. The one thing I was not able to figure out was how to turn those white squares in the emissive map into spherical gradients. This would’ve made the lighted parts feel more like they’re glowing from a light source and not feel quite as flat as they do now. Even now, as I write this, I keep thinking up ways that I might be able to make that gradient but even those haven’t yielded anything that works just yet.
The second shader I moved to was a water droplet effect. This one was a mix of the particle system and shader graph. I worked first on the drip through the VFX graph but realized that in order to get the particles to interact with other objects and despawn, they have to be using the particle system. After starting on and stopping on the VFX graph I made a water droplet alpha to use with the shader graph using Photoshop. I had it use a gradient from the bottom up as well as a spherical gradient from the center so that the effect on the droplet will be the strongest where the mass of the drop would be and trail off where it’s falling from. The effect overall is very subtle, meant to be part of the background of the game as the player focuses on playing the game. That being said, I do wonder if I should do something more with the color or size of the drops to make them less realistic but more noticeable.
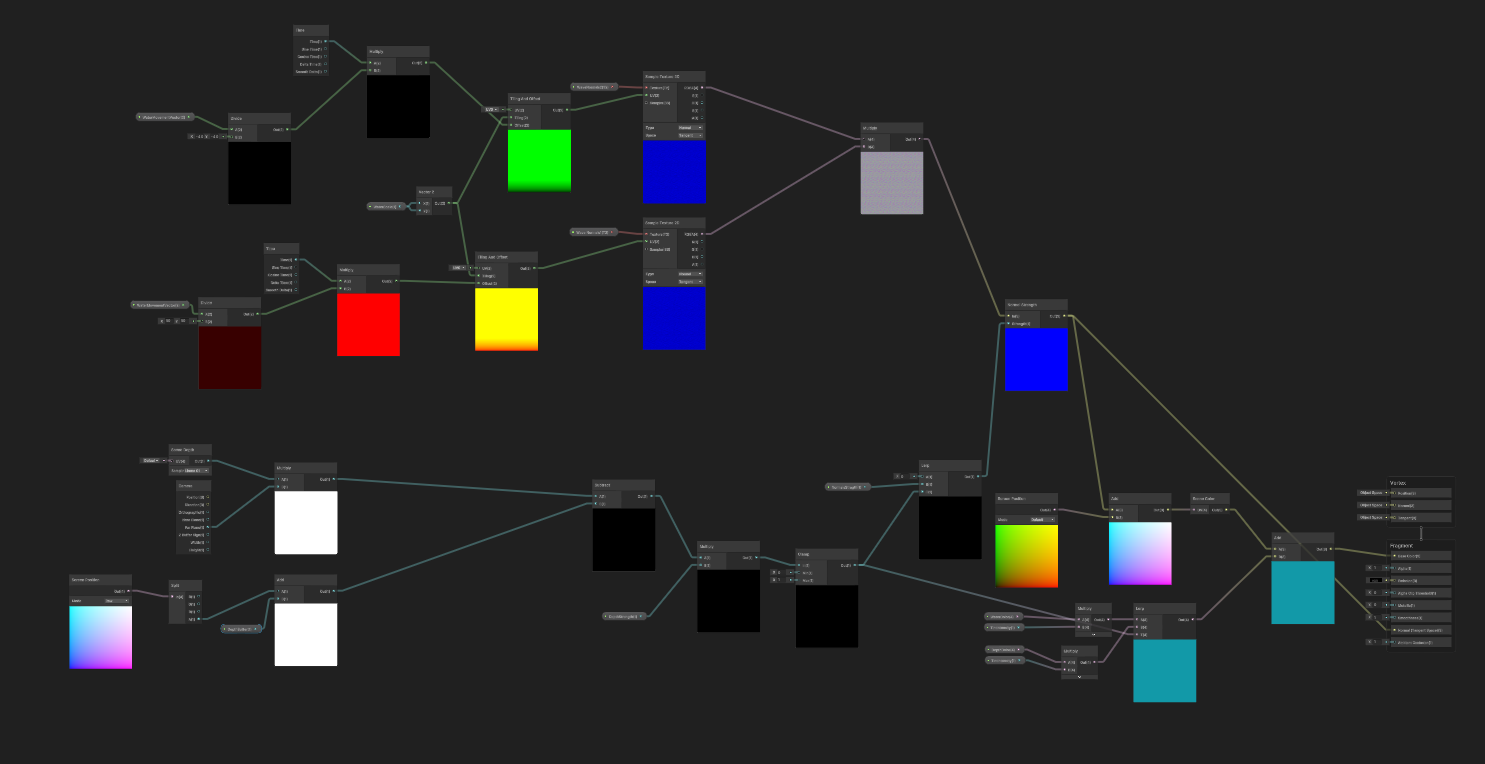
Now we move on to the first meaty shader, a water shader. Water is in so many games and comes in so many different forms but is so hard to make it seem real. For this one I definitely had to do my research and see how other people have done their water shaders. I knew I’d need distortion from the water so I made sure to look that up first to see how I could then apply that to a normal map for distortion. That distortion tutorial combined with a couple of noise maps I merged together got me something that looked very similar to water but was missing it’s characteristic wave-like pattern. I decided to look it up and there was a free, creative commons source of normal maps for water that I was able to choose from to add to my project. Using these, I was able to get a lot better looking water that I could customize to be calmer, choppier, change the direction of the flow, the scale of the waves, and the colors of deep water vs shallow water. The effect isn’t perfect though, as objects that aren’t anywhere near the water that are still in front of the water from the camera view, will look like they’re reflecting off the surface. It’s something I would need to do where I take the depth where the effect is and mask out everything that is not close enough to it. I haven’t been able to figure out that part, but I really want to because otherwise I think this effect would be excellent and I would love it even more than I already do.
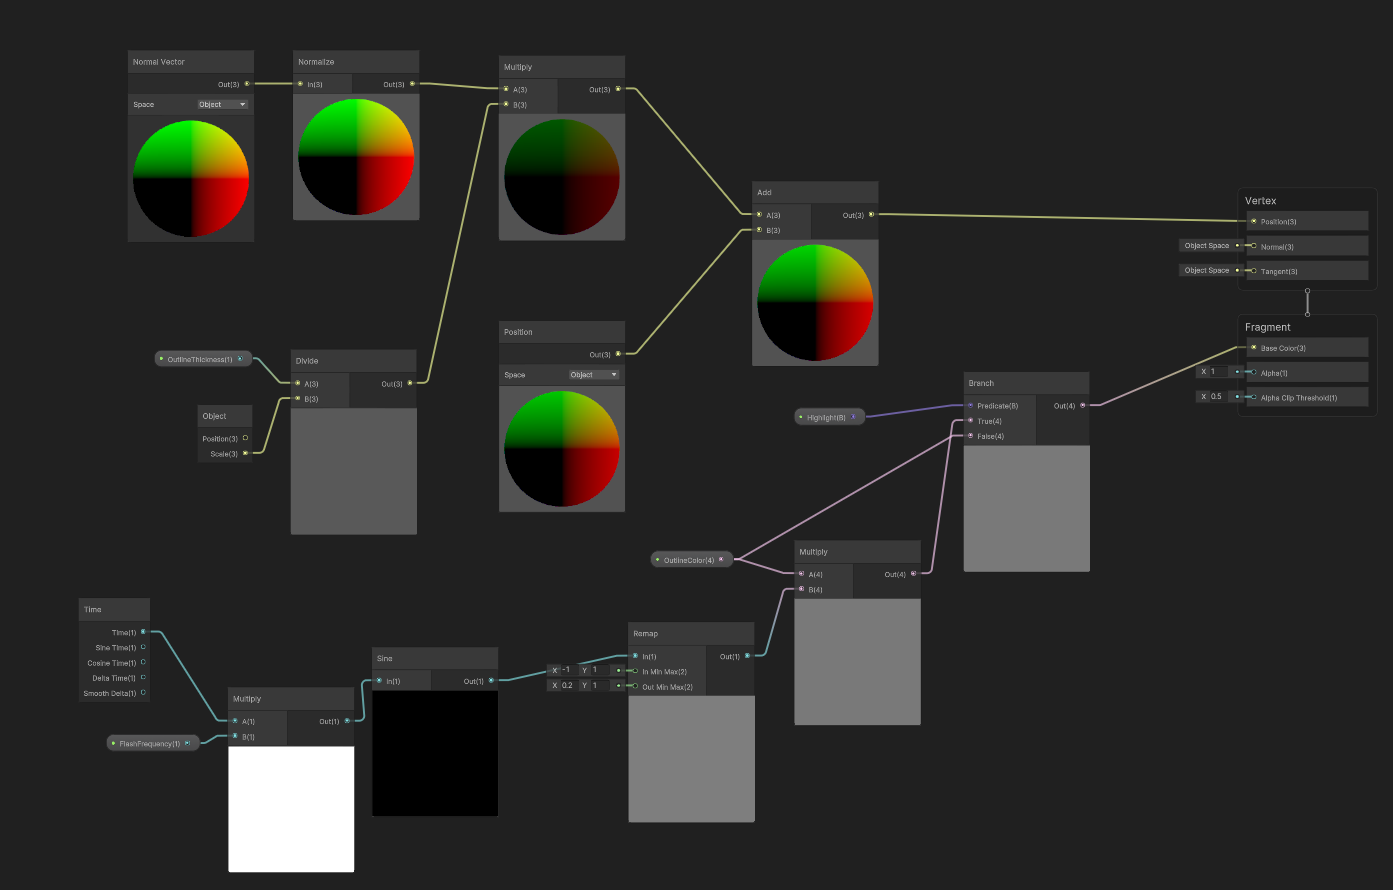
The last shader I tackled, that is also common but difficult to execute, is the outline shader. So many games and engines have an outline shader for objects but it is so difficult to execute! Something that can adapt to any model, any shape, and be consistent across all the angles and sides is really difficult with not much documentation on how to make it. A lot of people have a lot of different takes on how they’ve found how to make an outline for things ranging from hypercomplex hand written shaders to using a duplication of the entire mesh but with a different material. Eventually, I was finally able to find a tutorial that actually used shader graph in a way that I could actually understand. Now that I’ve seen this laid out, it makes total sense, I just could not come up with this combination of nodes in my own brain. Once I had this base to work off of, I had to also make the outline pulsate when needed, like when a unit would be selected. To do this, I put in a branch node that linked to a bool, determining if the color of the outline should pulse or not. What took more time was researching the API to make a companion script with this shader that allows the color and highlighting pulse to change on runtime. It has to be through script because that’s how the material can get instanced, allowing one unit to be selected without all units looking like they’re selected and glowing. Once I had the companion script made, I was much more confident that this shader would be a very usable part of the project.


Sprint 2
This sprint I got to spend almost the entire sprint making VFX for the game and I thought it was really fun! I learned a lot from doing all those effects and ended up really liking a number of them but I’ll get to that. Should record all the work I did, including the first backend, programming task of making an object pooler.
I do understand the importance of an object pooler in helping to keep the game’s performance in mind, and getting it established early in the project helps avoid future transition pain into using it. For my object pooler in particular it isn’t a Unity preset but a custom made asset that I’ve been piecing together since last semester. It allows developers to make object pools of various sizes of whatever GameObjects they want present in the game. It also has a default function providing a pool of 50 if they don’t feel like putting in a number for the function or forget. Additionally, they can pull an object from its pool and it will make a pool if one hasn’t been made already, helping to avoid errors coming from a dev forgetting to specifically make a pool. As one more bit of functionality, if a pool is completely used and a function asks for another object, it will instantiate a new one and add it to the pool for them, further avoiding errors of not having objects available. It should be pretty set up to avoid making any errors itself and thus make its addition welcome in the project.
And now with backend fashioned nicely, we move on to more artsy things! This first effect is something I was starting just a little bit last sprint and I’m pretty happy with how it turned out!
This is an effect for when an Entogear (the robotic bugs you control) dies. The game isn’t going for hyper-realism so I thought the idea of gears and sparks flinging everywhere when the thing dies sounded impactful and fun.
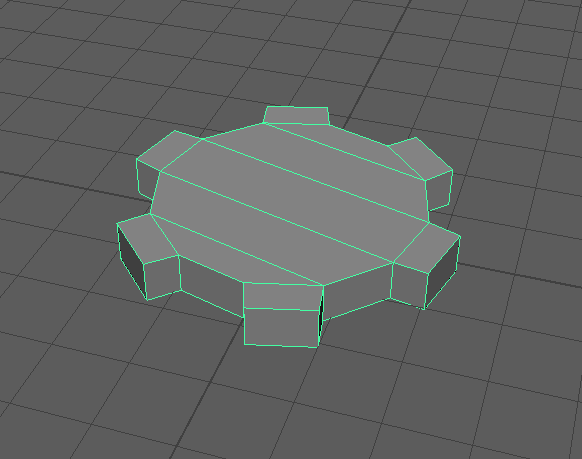
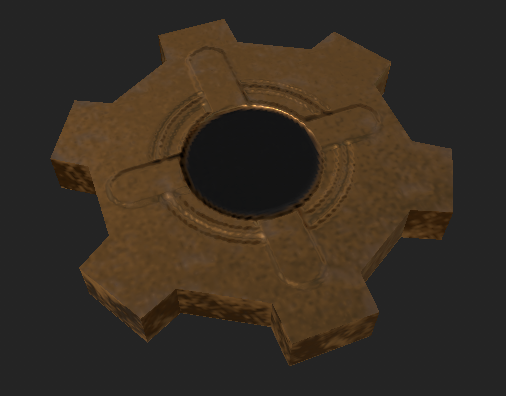
I had to model and texture those gears myself to use in the effect so I put together a quick, low-poly gear in Maya, UV’ed it, and gave it a steampunk looking texture of brass with a textured hole in the center. I wanted to be sparing in the poly count as this was just a VFX and a quick one at that, so it made sense to make them performance-light.
Once I had the gears, I moved into Unity to make them fly out from the Entogear. I added a smoke and spark effect before the explosion as well as the random flying gear going out in a random direction. I then capped it off when a big gear explosion with a flash, smoke, and a lot more gears. I also added vapor trails to the gears as if they had the smoke trailing after them. I also liked the addition of a short yellow trail coming off of them as it added a bit more dramatic flair to the explosion thinking that they were on fire or something similar.
I think the effect could be enhanced with the addition of sprints, sprockets, and other such steampunk bits to change up the explosion more but I don’t know if the leads feel like it’s effective time spent. So if they want a revision to the effect, I’ll know the first place I’ll start.
This next effect will be for when the Entogear is charging for a special, two turn attack. This effect I really like in how it’s presented and how I added layers to it and made it really feel powerful. I made a ring texture in photoshop to use as the power rings and then used Ribbon generators inside of Unity’s visual effects graph to make the streaks and then finished off with the big glow. Something that I don’t like as much now looking at the effect with fresh eyes is that the streaks and the glow don’t seem as synced up as I would like them to be. Ideally, I think the steaks and power rings should be inside the object and gone before the pulsing starts. I think that how it is right now seems just a little sloppy because the timings don’t seem to line up. However, I’m a big fan of the overall effect and I think it speaks to the in-game effect it’s supposed to represent.
These next set of effects outline attack orbs and a continuation on that base effect I made last sprint. Now, I’ve taken each elemental attack and added an outer effect to get across the right feeling of the type associated.
This first attack is the Electro type attack, and so I took obvious inspiration for a sparking, electric ball for the attack. I made the ball so that it flickered a lot more giving that chaotic feeling. Making the arcing electricity actually took a lot more tinkering than I expected to get the angling, the length of the arc, and the speed that it travels. I ended up combining a number of nodes including a turbulence node for the general movement noise and a “conform to sphere” node to make sure they moved outward in a generally spherical shape. I also added little spark particles to add another layer to the effect that I think help adds to that electrical feeling. I’m really happy with this effect and I think it came out amazing.
This next attack was the pyro attack and I’m really happy with this because this is the best fire/smoke effect I’ve been able to achieve to date and it makes me very happy. I made the base attack orb flicker a lot less than the electric one but still pulsate like you’d imagine a campfire would. With anything fiery I immediately think fire and smoke so I set out to do just that. For the fire and the smoke effect I actually used the same “Simple Smoke” texture that comes with Unity, just adjusted the colors to match a little better. After that, I randomized the rotations of the texture spawned so they would look a little different from each other, and that helped break up the monotony of it, but what really changed things was when I discovered alpha clipping. With that, I was able to randomize how much of the texture was cut out per particle that was spawned, and combined with the different rotations of the texture created the awesome, chaotic fire feeling of that effect. It makes me so happy to look at that little ball of fire in the middle and see it as an actual ball of fire. As well, I made it so when the attack moves, the smoke and fire trail behind it which I think adds such fun feedback. However, I think I got so excited by how good the fire looked that I missed that I could’ve added some sparks dancing up above the flame to add another layer and more fun to the effect. Still, overjoyed with how this turned out.
Coming hot off the heels of the fireball effect I moved straight into the Steam type attack. For this I decided to do a cooler take on steam as opposed to a burning take, as I thought that was too much overlap with the fire, so I chose cool colors and gentle pulsation for the central orb. For the steam effect itself coming off the back of the orb, that framework I had just made with the Pyro attack earlier, so I used those same principles but to steam that moved out to all sides of the orb and dissipated quickly. I also changed the color to be much more white so it looked much more like steam. I think the same trailing effect added a lot to this effect and I can’t wait to see it launched at an enemy to see how it looks. The only thing I’m disappointed about in this effect is that I feel like maybe it’s a little too simple. I’m not sure exactly what I would add but it feels like it needs something to really give it that dynamic push towards a great effect.
This one was fun. This is for the Sol type attack which is meant to have a nature-y feel to them so I started thinking, swirling leaves. I first made the primary orb yellow with a green center because that made me feel sunshine and plants, which I thought was appropriate. I found a creative commons leaf texture online and adjusted it so that it was transparent and usable by this effect and then got to work making them swirl around the orb. I originally was about to stop at that but I really felt like I needed to add something else to the effect as the plain leaves were just too little. I ended up on green swirling energy orbiting slowly around the sphere. I’m glad I added it because I think it made it much more appealing and interesting to look at. I tried to make it so the leaves trailed behind the orb when it moved, but the leaves would get very chaotic when they got too far away from the orb and I felt like it was very distracting so I left that part out. I do think the effect would be stronger if I could figure that out but I wasn’t able to so I decided it was better to move on for now instead of spending another couple of hours trying to figure something out.
This is the 5th and final attack type Metal. For this one it was a lot harder for me to figure out how to shape it. I knew I wanted the pulsing to be the slowest of all the types and to be very consistent. As well I knew I’d want to at least mimic a steel ball but with more energy. I batted back and forth with a few ideas before settling on the idea of the white particles swirling around the orb. They almost look like the sheen of shiny metal but move in a chaotic pattern like they’re a form of energy and I felt like it fit very well with this metal type attack. It took a while to get the particles to orbit the way they do because I wanted to be a bit more controlled than just flowing everywhere, so I have them generally flowing horizontally along the sphere rather than vertical as I felt like this implied more control than with them flowing everywhere.
This final effect I had time for this sprint was an impact effect for when an Entogear is hit by an attack. I personally think that we should have this more specific to each attack rather than a generalized effect, but perhaps there will be time for that and I’ll simply do what’s asked of me the best I can. I decided impact smoke and sparks would be the best way to go for this effect. Now, unlike the sparks that are coming from damaged Entogears that are blue, I felt like the yellow sparks made more sense with a metal, scratchy kind of impact. Making these sparks fly through the air the way I wanted was actually very difficult for some reason. I kept having to make little adjustments to this and that trying to balance the sparks moving randomly but still following a generally arching path as they fade out. It was an obscene amount of testing a number, see how it looks, testing a new number, seeing how it goes, etc. I think it’s a good effect right now for a general impact but I think it’s missing something to be as punchy as I’d like it to be. I’m not sure exactly what that would be, maybe vapor trails, maybe more variety of spark sizes, or more to break up the smoke impact texture. I’m not sure, but it feels a little flat right now and I’d like it to feel much more punchy.


Sprint 1
This was kind of a crazy way to start the project and get things rolling. I’m glad I’m not a lead this semester because the crunch my leads have been put under in trying to get the project up and rolling is brutal. The result is we ended up with about a half sprint with a lot of questions still going around as to organization, how production will continue, and roles people will fill, like me! I figured I was going to get right into programming but I’ve taken the role of a more traditional Lead Programmer in that I’m more directing and guiding the other 3 programmers on the team while I work on other things and don’t actually program much myself. It’s a strange place to be in, but let’s get into the work I did for the sprint.


A lot of the first sprint was me talking to the leads to get an idea of what they wanted me to do as well as the other programmers, and making sure that the other programmers had an idea of where to start for their general tasks. Once we had them squared away and I had a couple things to do myself, I started working on some general project helpers. First up was upgrading the project to URP. I imagine we would’ve originally started in URP but the prototype has already been made and had many needed base functions we had to work with and that somehow got decoupled. I wasn’t sure exactly how you upgrade an existing project into URP, but it turns out it’s about as simple as finding the package in the package manager, downloading it, and cleaning up any settings that have missing files. With that done, I was able to move on to the more interesting bit, the Event Bus.
I’ve done a few event buses in the past and found them to be incredibly useful in overall game triggers like “Game Over”, “Game Start”, or “Game Paused” states so I knew we’d want to have one for this game as well. It also serves as an easy way for multiple programmers to work code off of a single triggered event so they don’t have to couple their code so much. This time around though, I learned from my talented programmer friend Tucker Holmes about an adaption he made where you could pass data along with the event using generics. I thought this sounded really useful, so he walked me through what he did and helped me to debug it after as well. Turns out, it’s not all that different from the syntax of a regular event bus, but there’s quite a few little annoying changes you have to make so that everything runs like casting correctly, using slightly different variables, and lots of generic symbols everywhere. I ended up with a lot more errors than I thought, but again, it was a lot of little things that I either forgot about or didn’t realize mattered in this new context. With that done, I’m excited for how it will help keep the game production moving forward quickly as we continue.

The next thing I did was to create a potential class map of the units. I wanted to have something where the programmers could code very specific things, like different unit actions, and have a variety of effects on the other units, like different statuses, damage over time, slows, etc. I used a base unit class that has a bunch of delegates that make up the different event timings that you might want a status to trigger like on the start of the turn, when the unit dies, or when the unit attacks. When a Status is applied, it would be a script that would get added that a unit could subscribe its functions (the effect) to any one of these delegates and then unsubscribe them and delete itself after a certain amount of time (however long the status is supposed to last). I found out later that my lead designer may not want to have statuses in the game as they’re looking to make it very lightweight in terms of strategy. So, we may not end up using this in the game, but I think it was great at least for myself to go through this thought for maybe a future strategy game I come up with that I want to program as I’m pretty proud of what it is.

Once I laid some of that groundwork for the project I was asked to pivot into a more artsy role of making VFX, which I think is really fun! This effect was one that was supposed to be when an Entogear (a robo bug that is the main unit you control) is heavily damaged and close to dying. Originally my task was written as just a smoke plume coming off of the bug, but because these are mechanical/steampunk themed, I thought it was appropriate to add some sparks coming off as well. I think it adds more of that feeling of things not going right and that something is very wrong, not just that something is smoking which I think can be a bit more vague. I had to relearn how to use the ribbon system in Unity’s VFX graph but I think it was so worth it to get the streaks coming off of the sparks as they fly around. I made sure they moved quickly at first and then slowed down before disappearing, as well as adding some randomness to how they move in the air, specifically at the end of their path.
The smoke is actually a pretty simple effect that is a smoke texture with a lighter gray starting color that moves closer to black before fading out. I fidgeted a while trying to get the smoke to not feel too fast and also to disperse the way I felt like it should. As well, I had the size of it change over time to get larger to simulate it expanding and dissipating.
The last VFX I did was this orb that will be for the Entogear’s attack. There are 6 or so types of Entogear that are similar to Pokemon in that their attacks will also be themed to what type they are. Knowing that, I knew this effect would need to be more customizable, and knowing it was an attack that could be ranged, I knew I wanted it to feel energetic and full of power. I started with making the base ball and setting it up so that it could have a customizable flickering effect. After that, I made sure the color could be customizable. However, just one color didn’t really feel good enough, so I added a second effect that could have a second color so there could be different core and perimeter colors, allowing for a more customizable feel.
This isn’t going to be the end of these attack effects however. This is meant to be just the base of the attack for now, and I’m planning on making separate effects for each of the types that will work in conjunction with these orb bases to make the attacks really feel tailored and fitting to the type of attack they are.
Overall, weird but good sprint. Got to flex a little bit of coding with some things I think will help the project as well as dive back into VFX which I have a lot of fun with. As well, I might be diving into more VFX this next sprint and I can’t wait to see what a full sprint’s worth of VFX looks like.
Comments
Post a Comment